![]()
![]()
![]()
![]()
![]()
![]()
![]()
![]()
![]()


All my content and ptohos

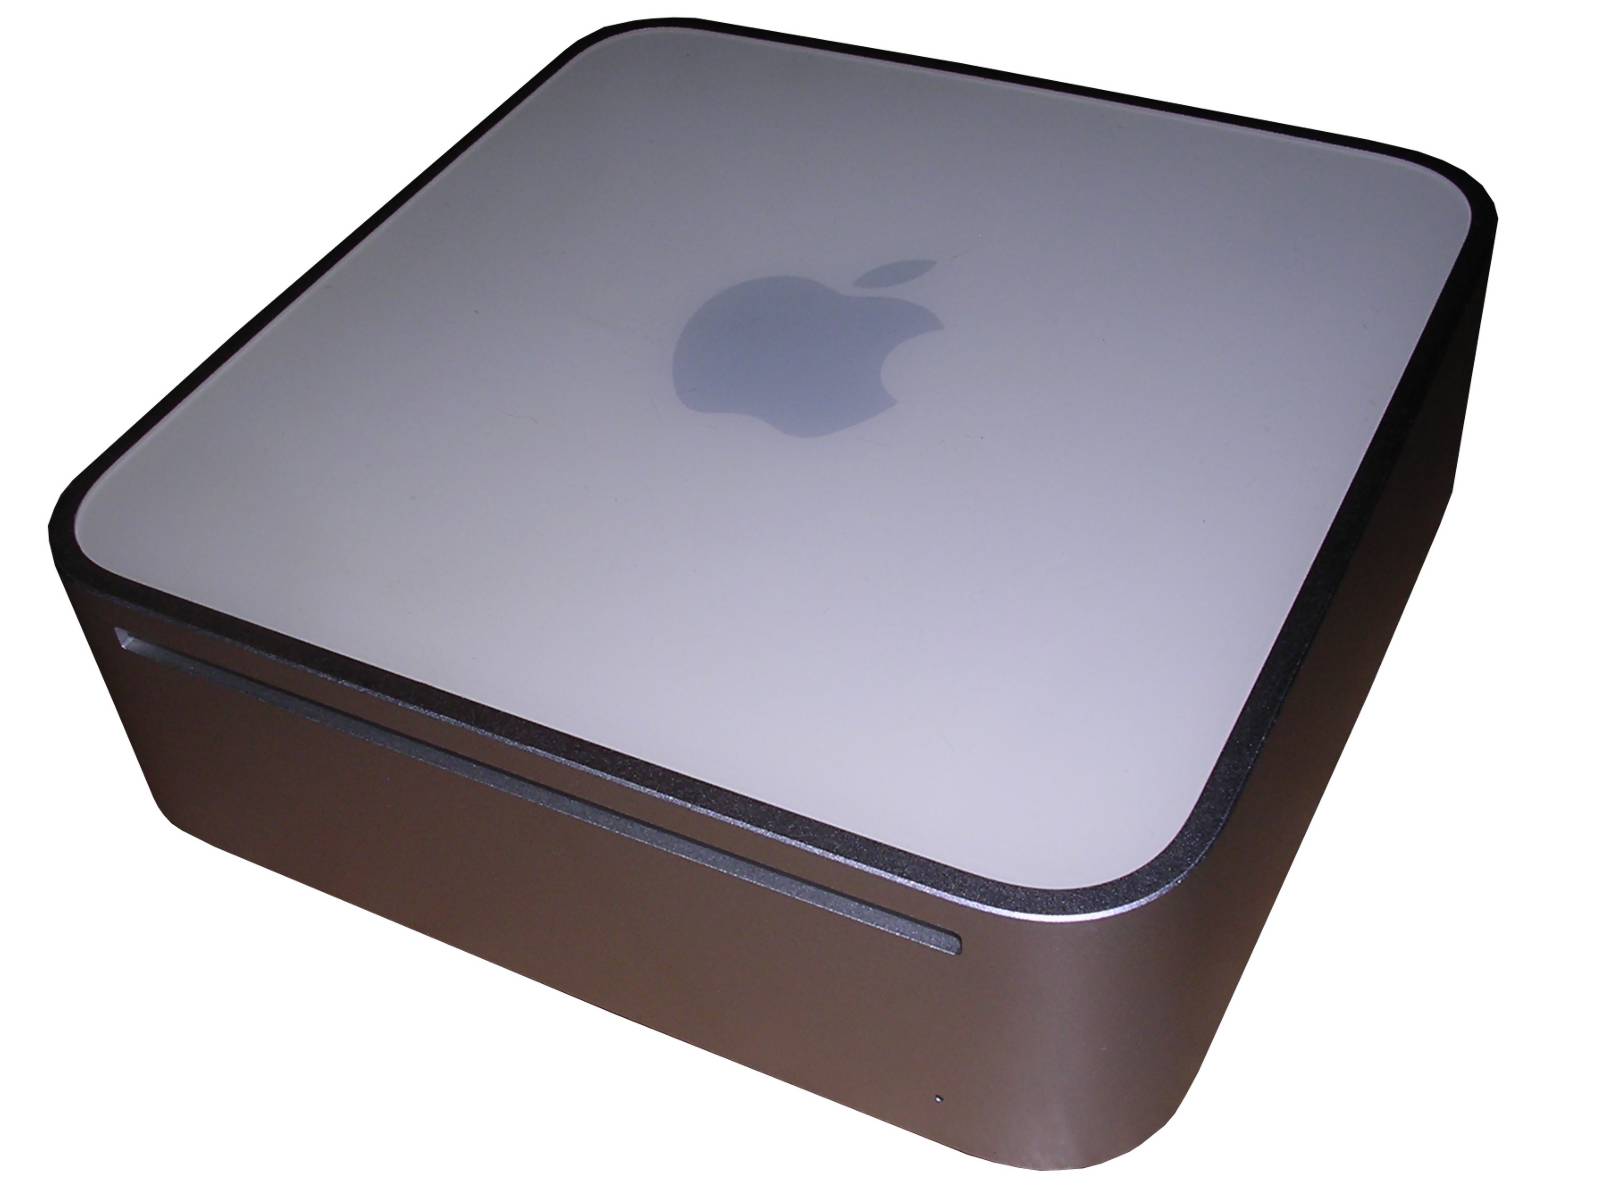
Mac mini (2005)
In 2005 Apple decided to reach more users by offering
cheap computers with simple capabilities for a small price. Mac Mini was
one of the first machines of this sort. It was sold cheaper than
full-featured Macs as something like "try a Mac". It came with external
power supply unit and no peripherals - in iMac era it was common in
Apple computers that they were sold with mice and keyboards, sometimes
speakers and displays. Here, thanks to DVI connector any monitor and USB
keyboard/mouse could be connected.
Inside its specifications aren't very high-end - a single PowerPC
processor running at 1.25 or 1.42GHz, 256 or 512MB in DDR DRAM and 40 or
80GB hard disk allows to run Mac OS X, use OS and work a bit, but more
professional applications won't run smoothly and with later system
revisions it's a bit slower than similar Macs. However, maximum Mac OS X
10.5.8 can be used on this computer. Components are notebook-like and
they're very compact.
Mac mini was popular in countries in which there was a significant price
difference between it and full iMac. In 2005 in Poland, Mac Mini costs
about 2000PLN (source)
while, on a trend of replacing professional computers with G5 machines,
it was possible to get second-hand Power Mac G4 in this price, getting
expandable machine (like Power Mac G4
MDD) with more RAM.
But these small Macs finally got their second life. After their typical
operation period, lots of them have been used as set-top boxes for TVs
with VGA input. These Macs look good under a TV, have a DVD drive and
can be remotely-controlled with wireless mouse.
| Model No: | A1103 |
|
| Year: | 2005 | |
| Discontinued: | 2006 | |
| CPU: | PowerPC G4 1.42GHz | |
| RAM: | 512MB | |
| Max. RAM: | 1GB | |
| RAM Type: | 1 PC-2700 DDR1 | |
| Hard disk: | 80GB IDE, 2.5" | |
| Floppy drives: | None | |
| Other drives: | CD/DVD | |
| Graphics: | ATI Radeon 9200 (onBoard) | |
| Sound: | 3.5mm Jack sound input / output (Stereo), one built-in speaker. | |
| Display: | DVI (with analog pins) | |
| Dedicated OS: | Mac OS 10.3.7 (later 10.4) |
|
| Maximum OS: | Mac OS X 10.5.8 |
|
| Expansions: | USB, FireWire, AirPort internal expansion | |
|
Additional peripherals in collection: |
||
| Connectors: | - 2 USB
connectors - 1 FireWire connector - Ethernet (RJ45) - Modem - DVI Graphics output.
|
|
My unit is definitely from import, it was probably imported from other country as it has no dealer sticker, present on all Macs sold in Poland until 2006-2007. It was probably imported with more computers to recycle or resell and later used as a set-top box. These times a 10.5.8 OS has been installed on it with media player programs.
Installation of Mac OS X can be done from USB stick the same way as in G4 MDD.
| Disassembly | Overclocking | Links |
Disassembly
This is a bit hard, but possible. You have to place it
bottom-up and stick something flat between aluminium casing and bottom.
I fount that palette knife (tool to apply putty) is good and recommended
in many websites. Stick it near connectors side, inside there are
plastic hooks, you have to pry them, at least these near 3 ventilation
holes. Then lift the internals with connectors panel a bit. To make it
not pop in again, stick something between aluminium part and rear panel.
Do the same thing on the other side. Now carefully open it removing
internals from aluminium casing by opening it around front edge. Be
careful with AirPort antenna wires.
Most of these Macs have problems with dust on heatsink, fan starts early
and is loud. To get access to heatsink and fan, remove 3 screws holding
black plastic part to mainboard. Move AirPort antenna wires away and
open black plastic part. IT's still kept with some wires and there is an
edge connector for hard disk/CD there. Now you should have access to
heatsink on mainboard and fan, on the other side of black part.
The fan can be easily cleaned, just remove 3 screws keeping it in place,
then you can even disassemble its casing by unhooking them.
While re-assembling, pay attention to edge connector and AirPort cables.
Before closing the case, install AirPort antennas as they were using
shafts in black plastic part.
While closing the aluminium part, you can't do the same thing as in
opening as it's quite high. A good method is to start in the middle
between closing it like a book and putting one part to another, and then
slowly pressing it towards rear to make all hooks pop in their places.
This Mac can operate with case removed.
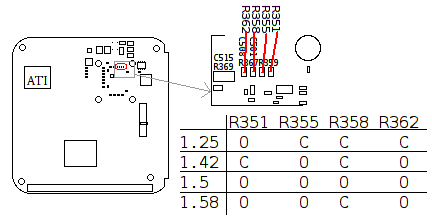
Overclocking
If you see internals of this Mac you know that I don't recommend overclocking it too much, at least 1.42GHz model. Overclocking a Power Mac G4 where heatsink's size is like a bag of sugar is different than overclocking a G4 with heatsink like matchbox, even with notebook processor. G4s are hot and this heatsink looks very small. More, 1.58GHz settings seems to be totally unsupported in firmware and this may make apps complain.
Information about overclocking are accessible on this site: http://www.lbodnar.dsl.pipex.com/macmini/
Local drawing:
Links
http://www.pamurray.com/manga/macbat-index.html - Modding Mac Mini
to run on batteries.
http://www.lbodnar.dsl.pipex.com/macmini/ - Overclocking Mac Mini.
For such small devices it is not be recommended. I found my one quite
hot even after cleaning.
https://www.ifixit.com/Guide/Mac+mini+%28PowerPC%29+Hard+Drive+Replacement/268
- Disassembly of Mac Mini with pictures.
http://www.lbodnar.dsl.pipex.com/macmini/macmini_ipod.html - A
mystery of Mac Mini FireWire connector in its HDD board
https://www.computeraudiophile.com/forums/topic/17368-mac-mini-isense-circuit/
- Power connector pinout with sense circuit. However there is a small
chance that you'll get the correct plug.
-